In the final blog of this series, we will guide you through the process of setting up Jenkins, a widely used automation server, In this installment, we will delve into the practical steps of configuring each stage of the pipeline and creating a Jenkins pipeline script that seamlessly orchestrates these stages. So, let’s get started!
If you missed the first part on getting started with DevOps for MuleSoft application (you can read it here) or the second part on setting up Jenkins and SonarQube for CI/CD (click here) , we recommend checking those out before proceeding with this blog.
Jenkins pipeline script with multiple stages:
To create a Jenkins pipeline script with multiple stages, start with “Checkout” to fetch source code, then “Build” using Maven. Next, run “UnitTest” in a Docker container, followed by “Integration-Test.” Perform “Code quality analysis” with SonarQube, proceed to “Deploy” the application, and conclude with “Postbuild action” for notifications and artifact generation.
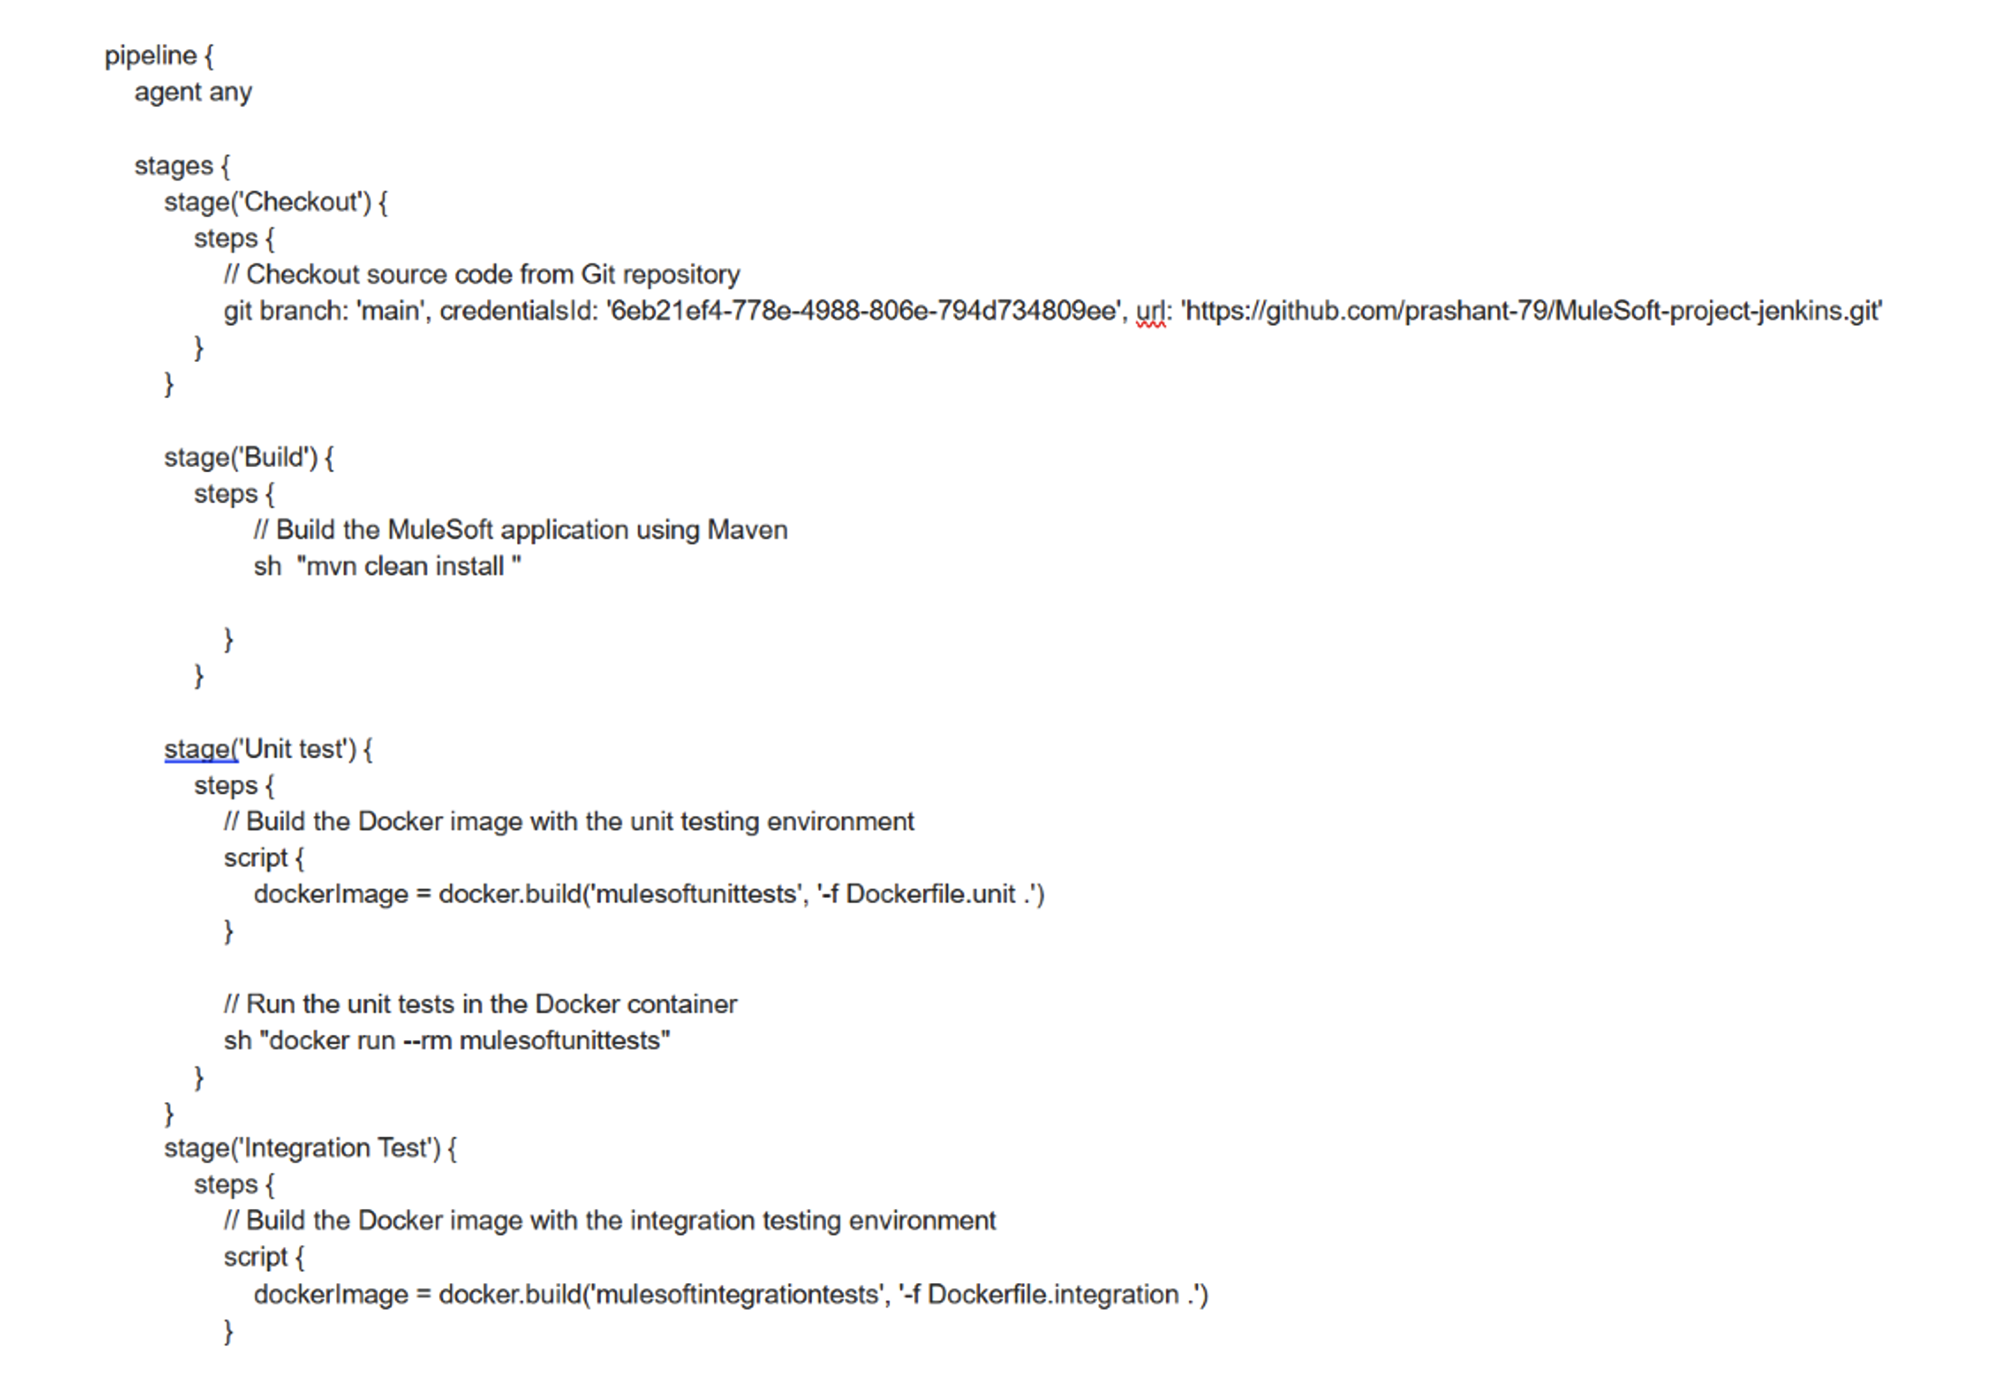
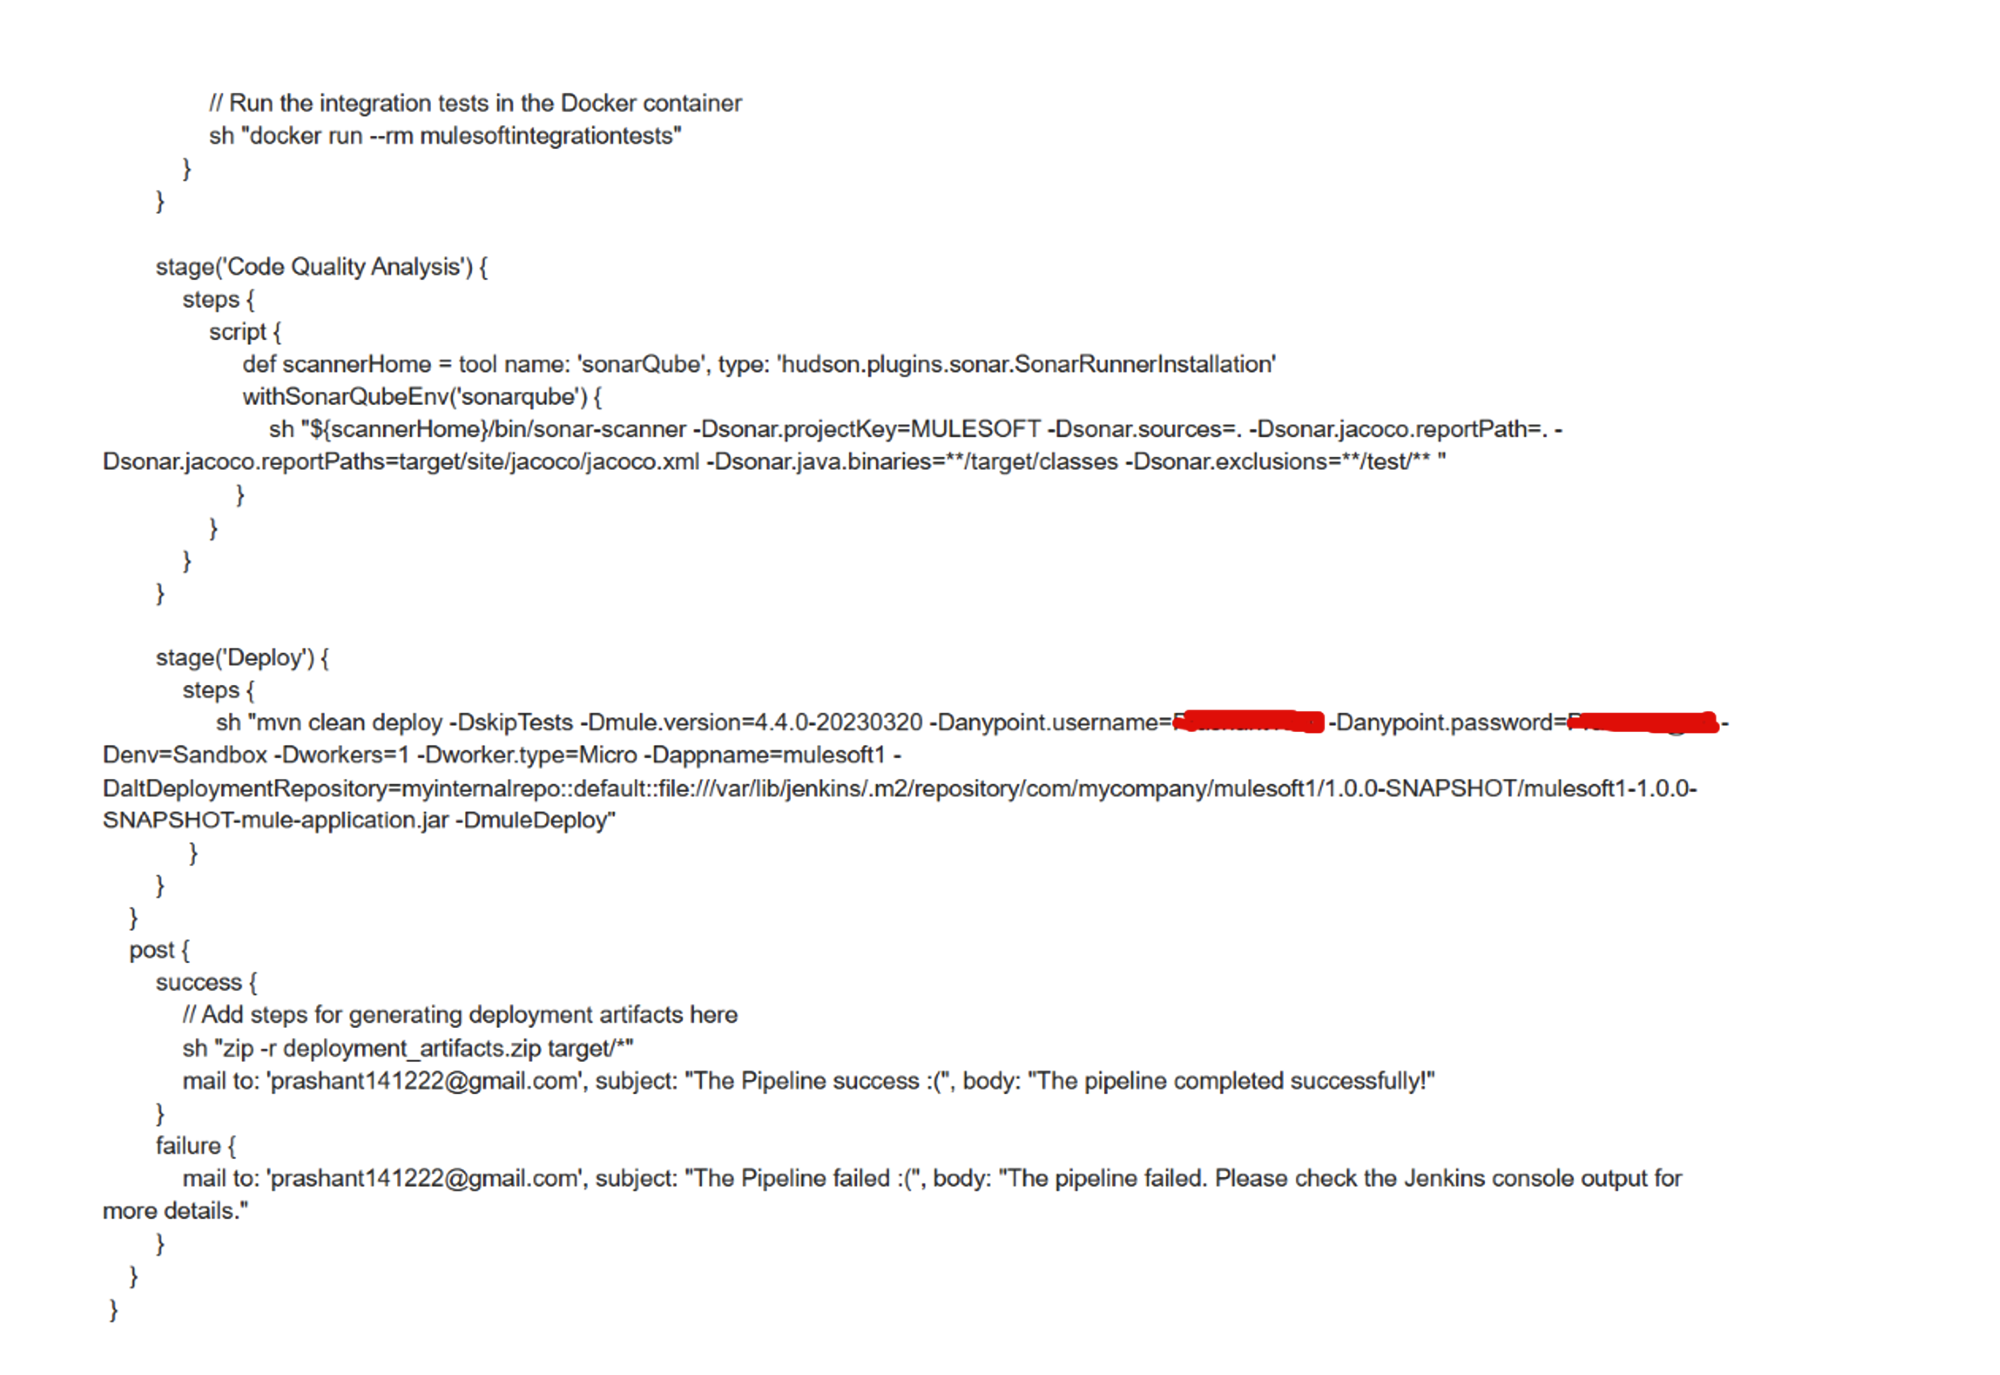
Now, we are going to know this Jenkins pipeline script with multiple stages in action.
Stage1 :Checkout
This stage retrieves the source code from the designated Git repository. It does so by utilizing Git to check out the main branch from the repository located at https://github.com/username/MuleSoft-project-jenkins.git.

Stage 2: Build
This stage involves building the MuleSoft application using Maven. It accomplishes this by executing the Maven command `mvn clean install` to compile and construct the application.

Stage 3: Unit Test
Creates a Docker image with the unit testing environment and executes the unit tests within the Docker container. It builds a Docker image named “mulesoftunittests” using the provided Dockerfile (Dockerfile.unit) and runs the unit tests within the Docker container using the command `docker run –rm mulesoftunittests`.

Stage 4: Integration Test
In this stage, we build a Docker image called “mulesoftintegrationtests” using the provided Dockerfile (Dockerfile.integration). We then run the MuleSoft application’s integration tests within this Docker container using the command `docker run –rm mulesoftintegrationtests`. This process ensures that integration tests are executed in a controlled environment for reliability and consistency.

Stage 5: Code Quality Analysis
In this stage, we perform a code quality analysis using SonarQube. We begin by setting up the SonarQube scanner using the specified tool installation. Next, we create a new project identified by the project key “MULESOFT.” Finally, we execute the SonarQube scanner with custom parameters tailored to the project’s configuration. This analysis provides valuable insights into the code quality of our MuleSoft application, aiding in the identification of areas for improvement and ensuring the maintenance of high coding standards.

Stage 6: Deploy
This stage is dedicated to deploying the MuleSoft application, incorporating specific configuration parameters for a tailored deployment process. The deployment is initiated by executing the Maven command `mvn clean deploy`. This command is enhanced with additional parameters designed to fine-tune the deployment configuration, ensuring a seamless and customized deployment of the MuleSoft application.

Now, we need to add cloudhub and mule maven plugin in our pom.xml file’s plugin section.
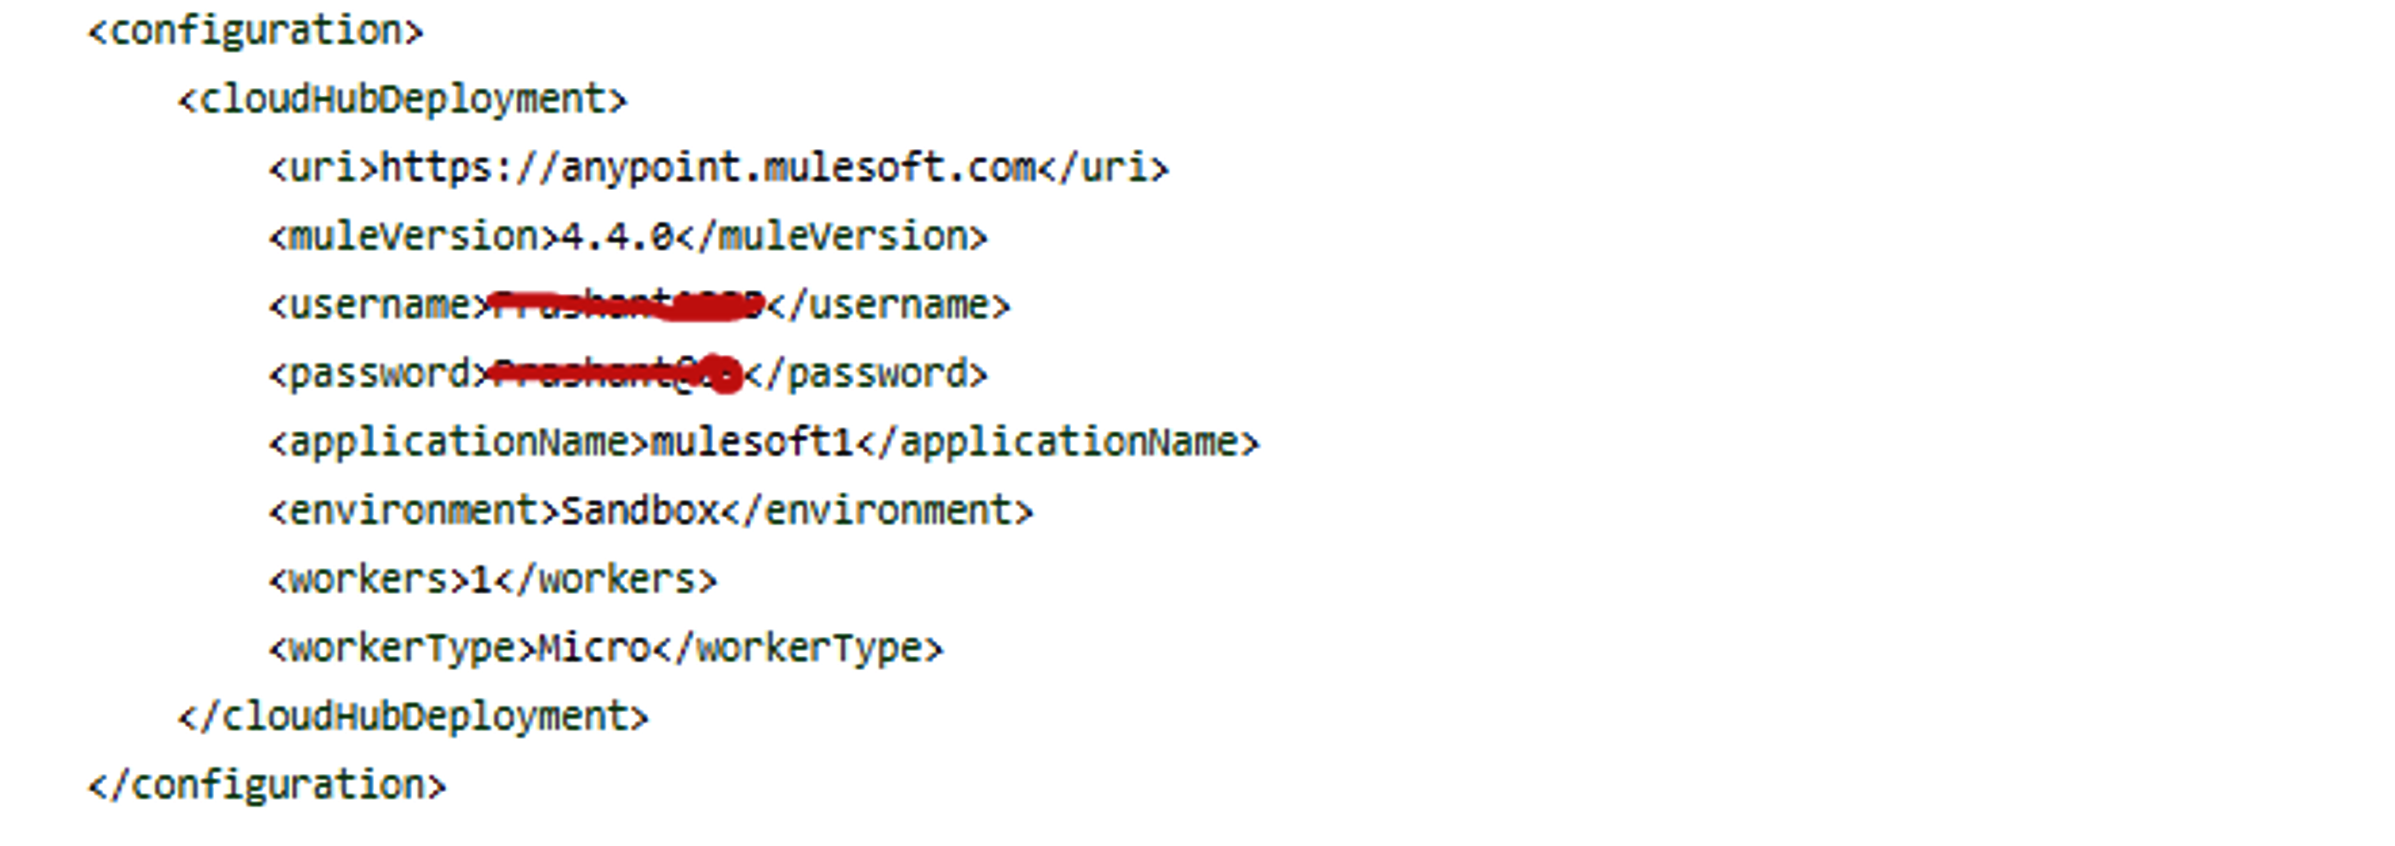
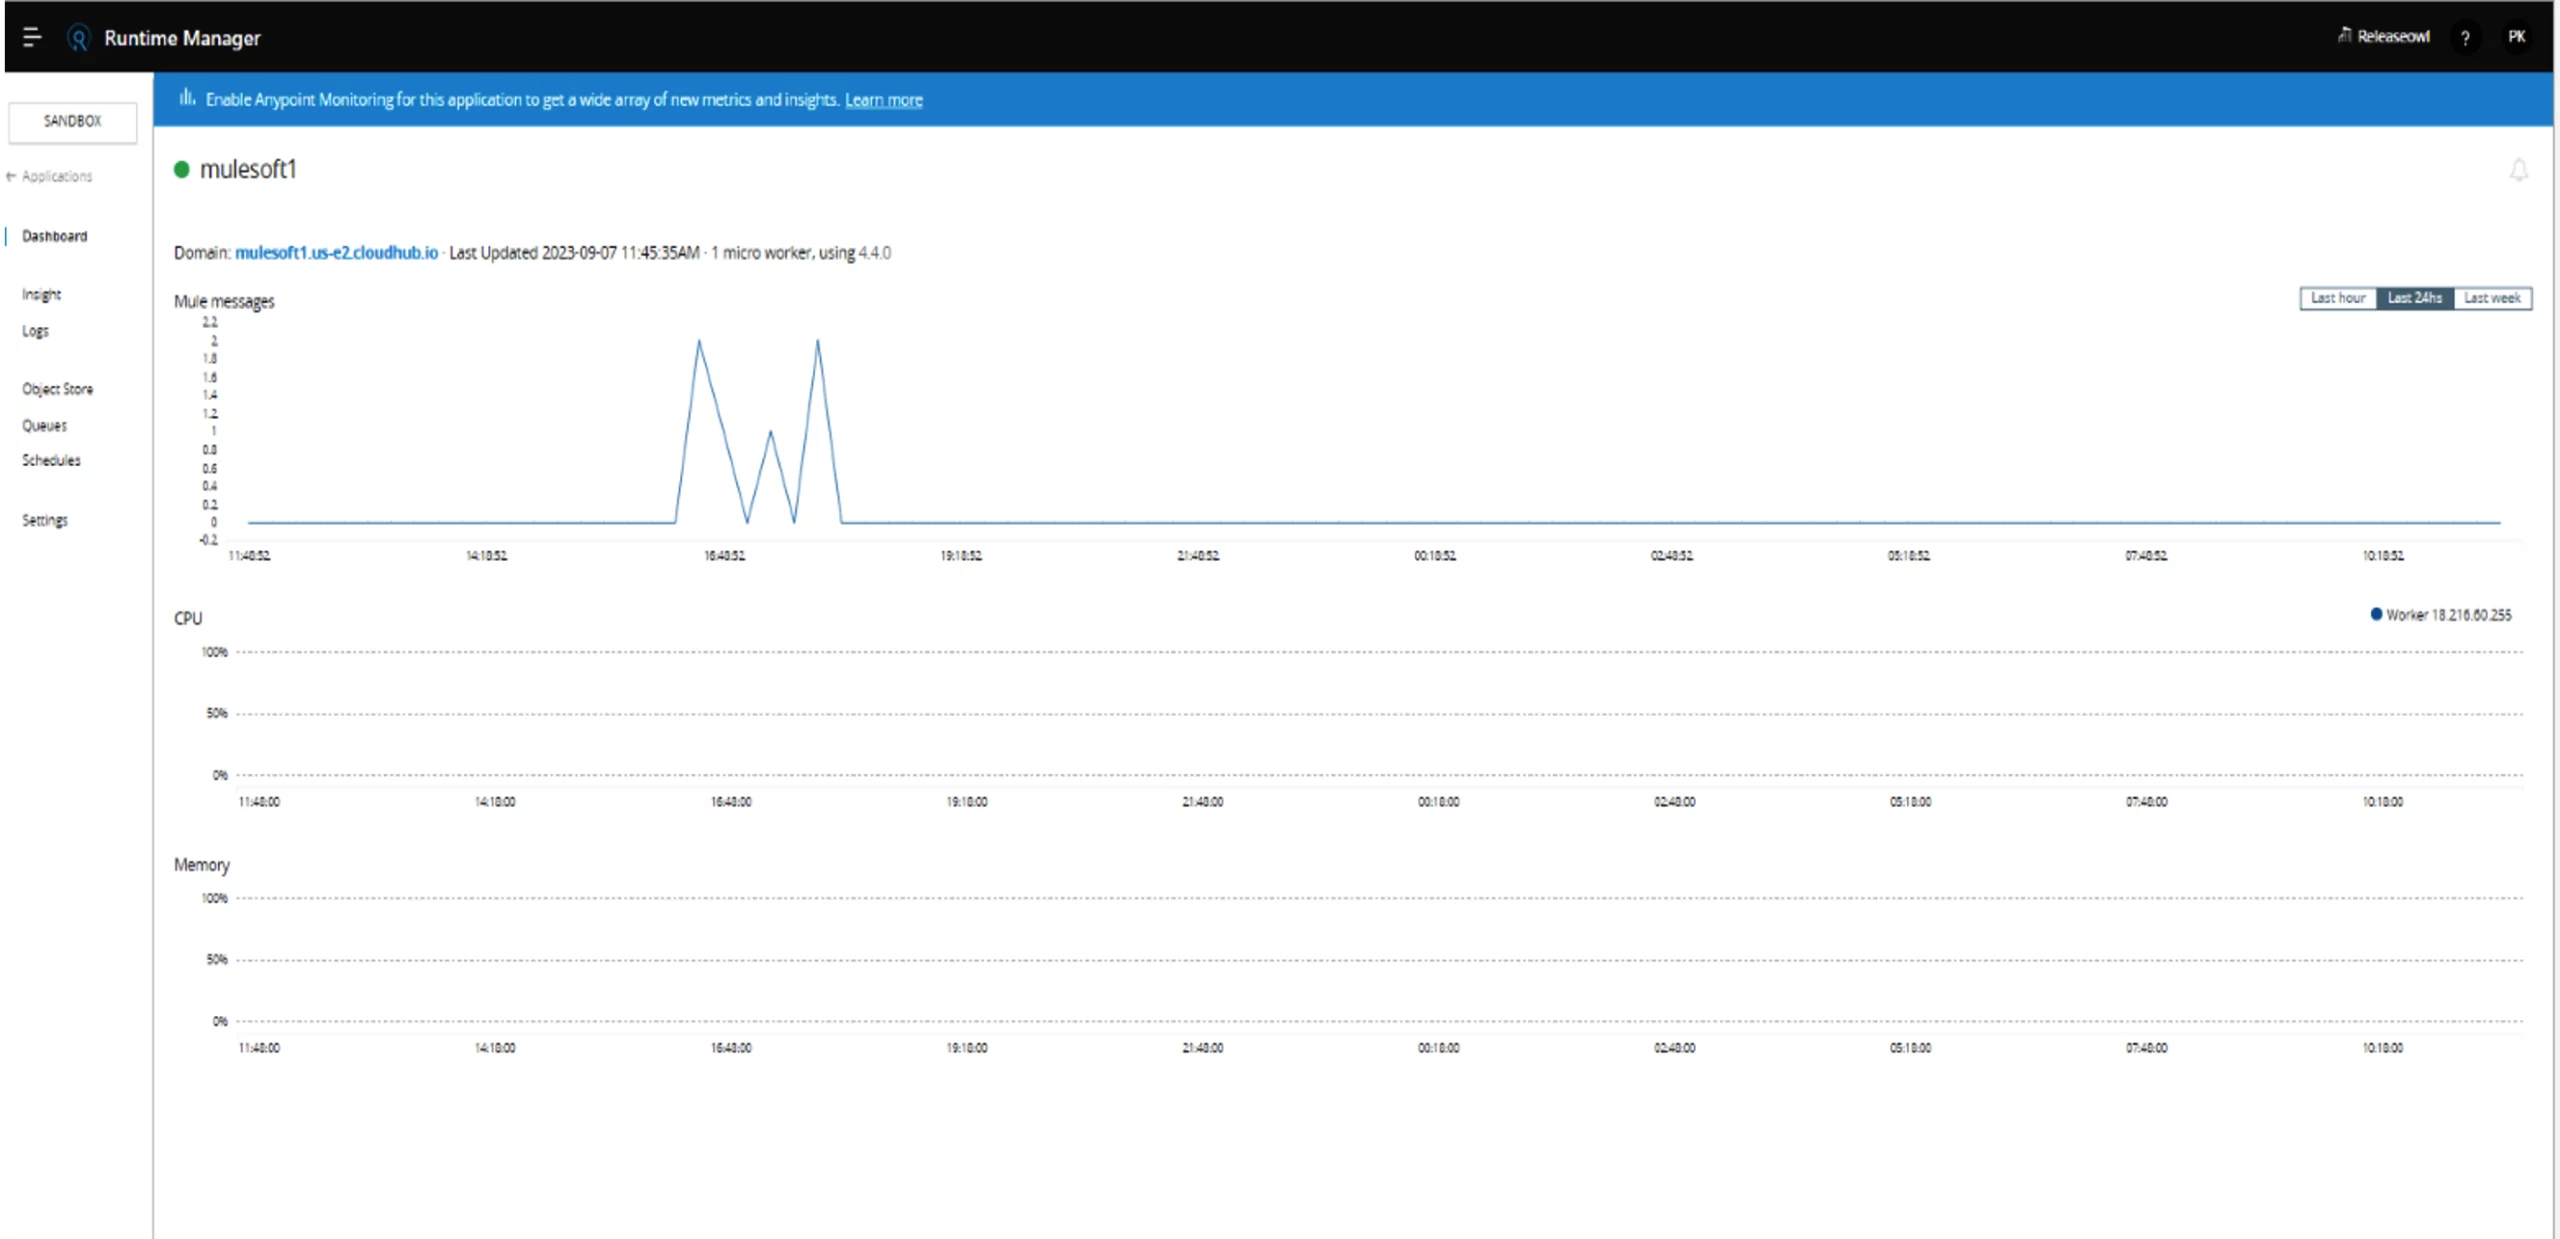
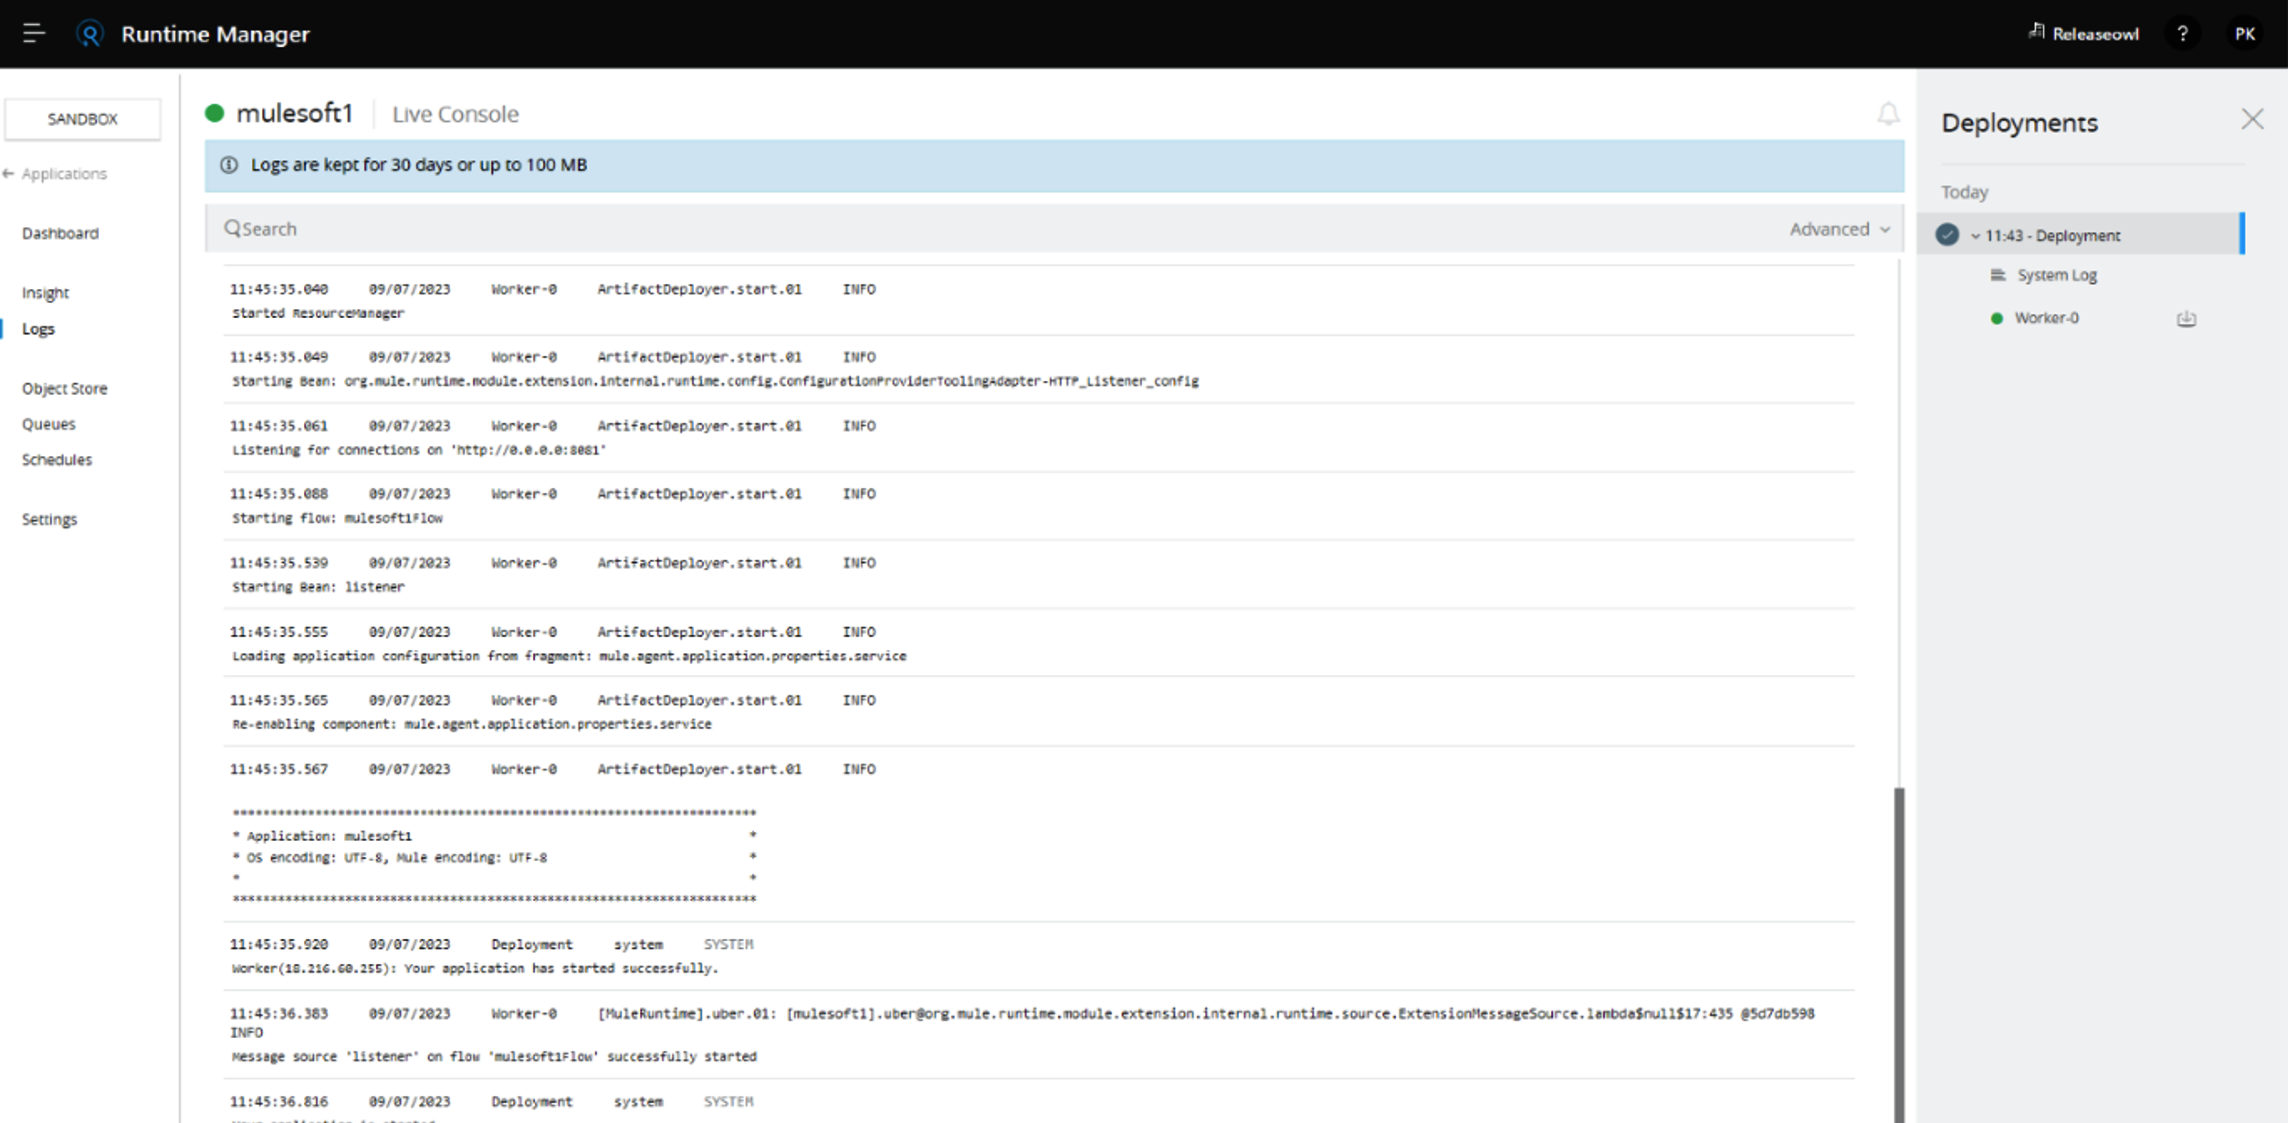
Then check our application by using mulesoft url mulesoft1.us-e2.cloudhub.io/mulesoft

Post build action
Here’s a step-by-step explanation of how this post build action works:
- Includes email notification and generates deployment artifacts in zip format.

- In case of success, it sends an email indicating success.
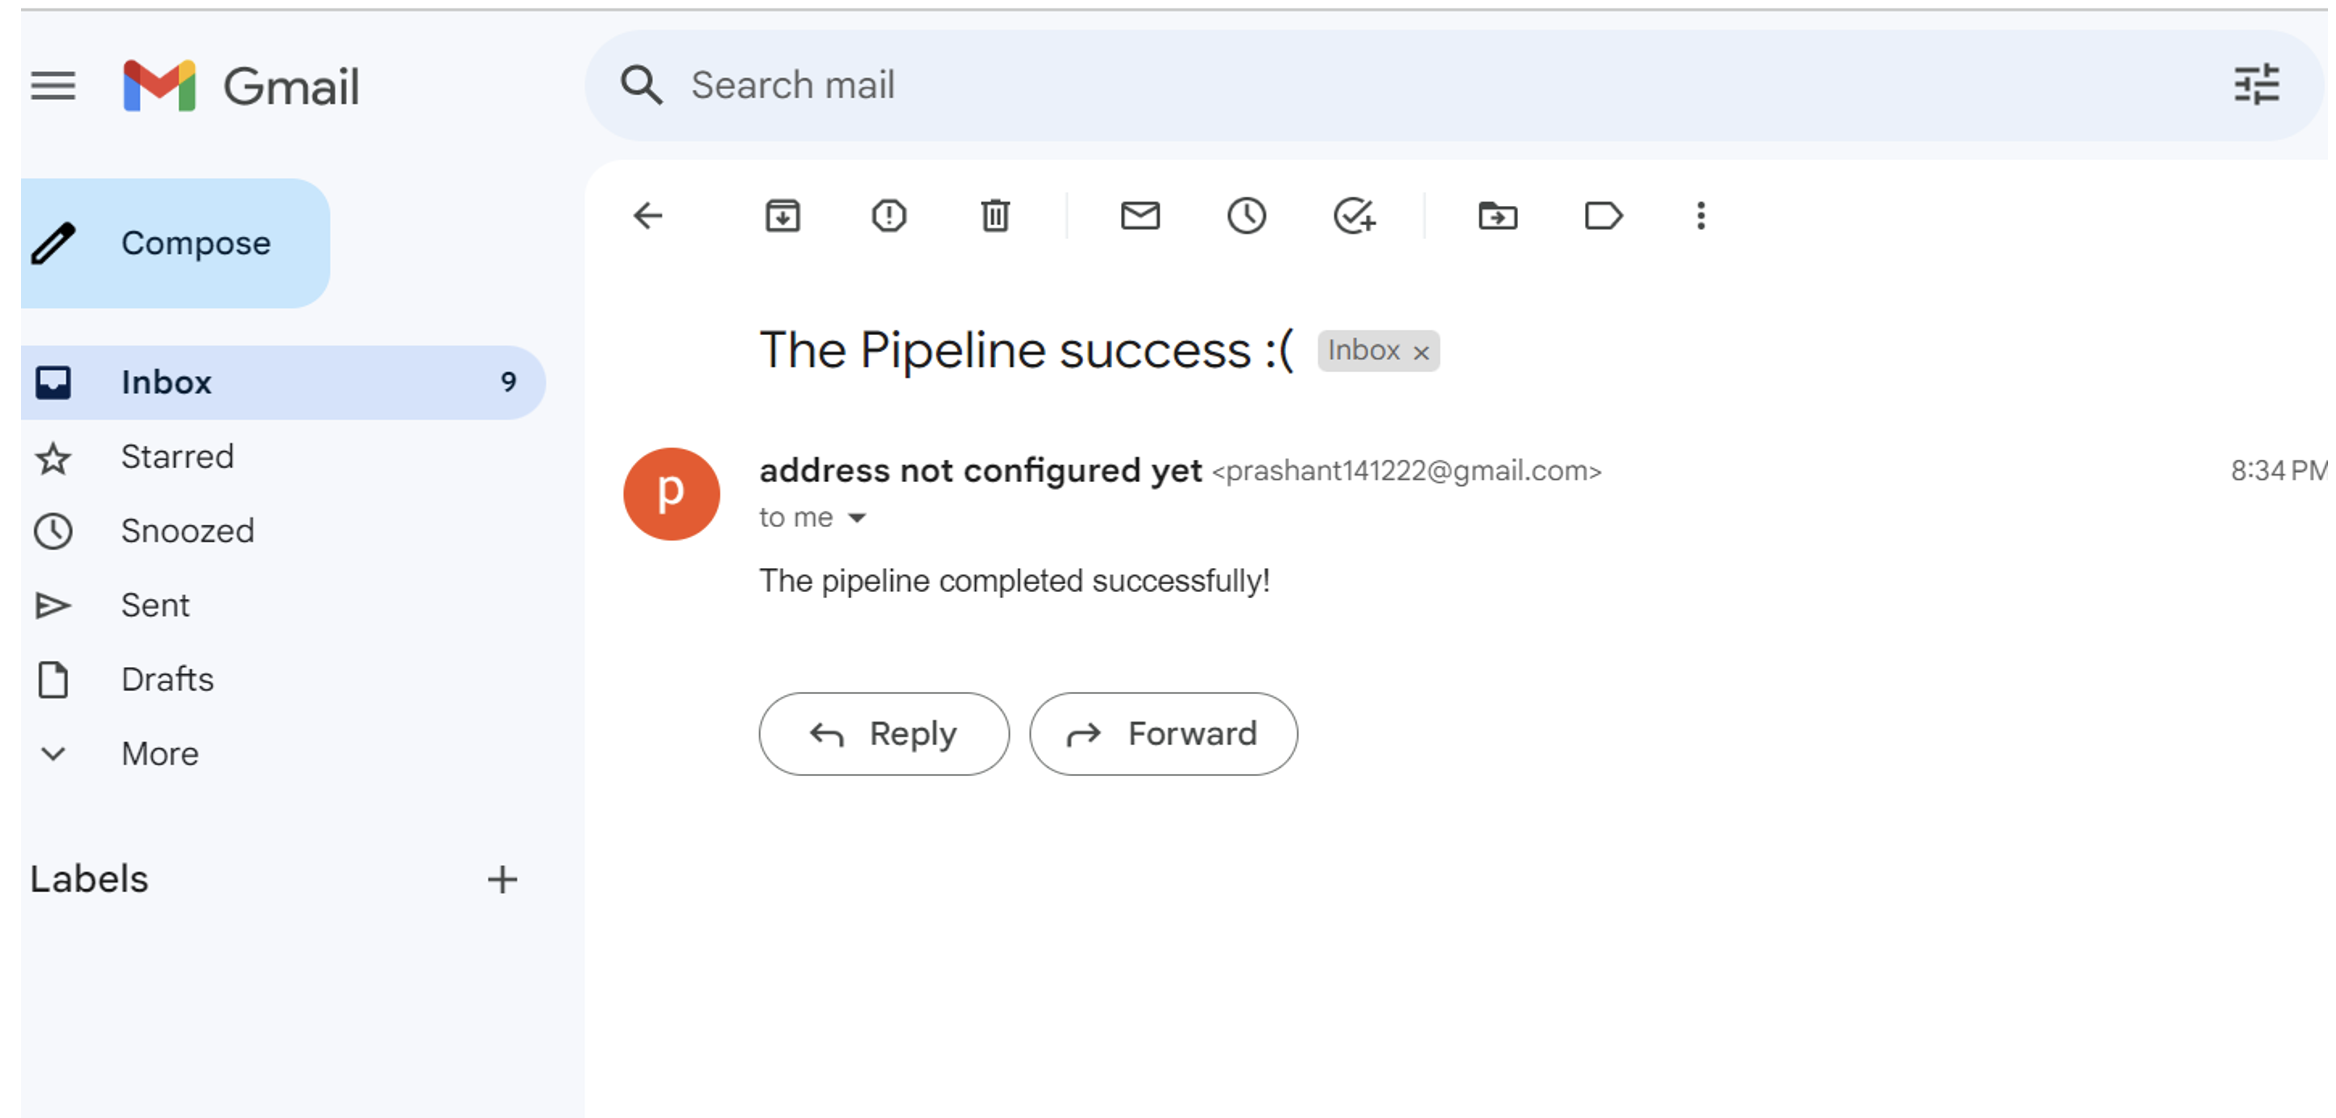
In case of failure, it sends an email advising to check the Jenkins console output for more details.

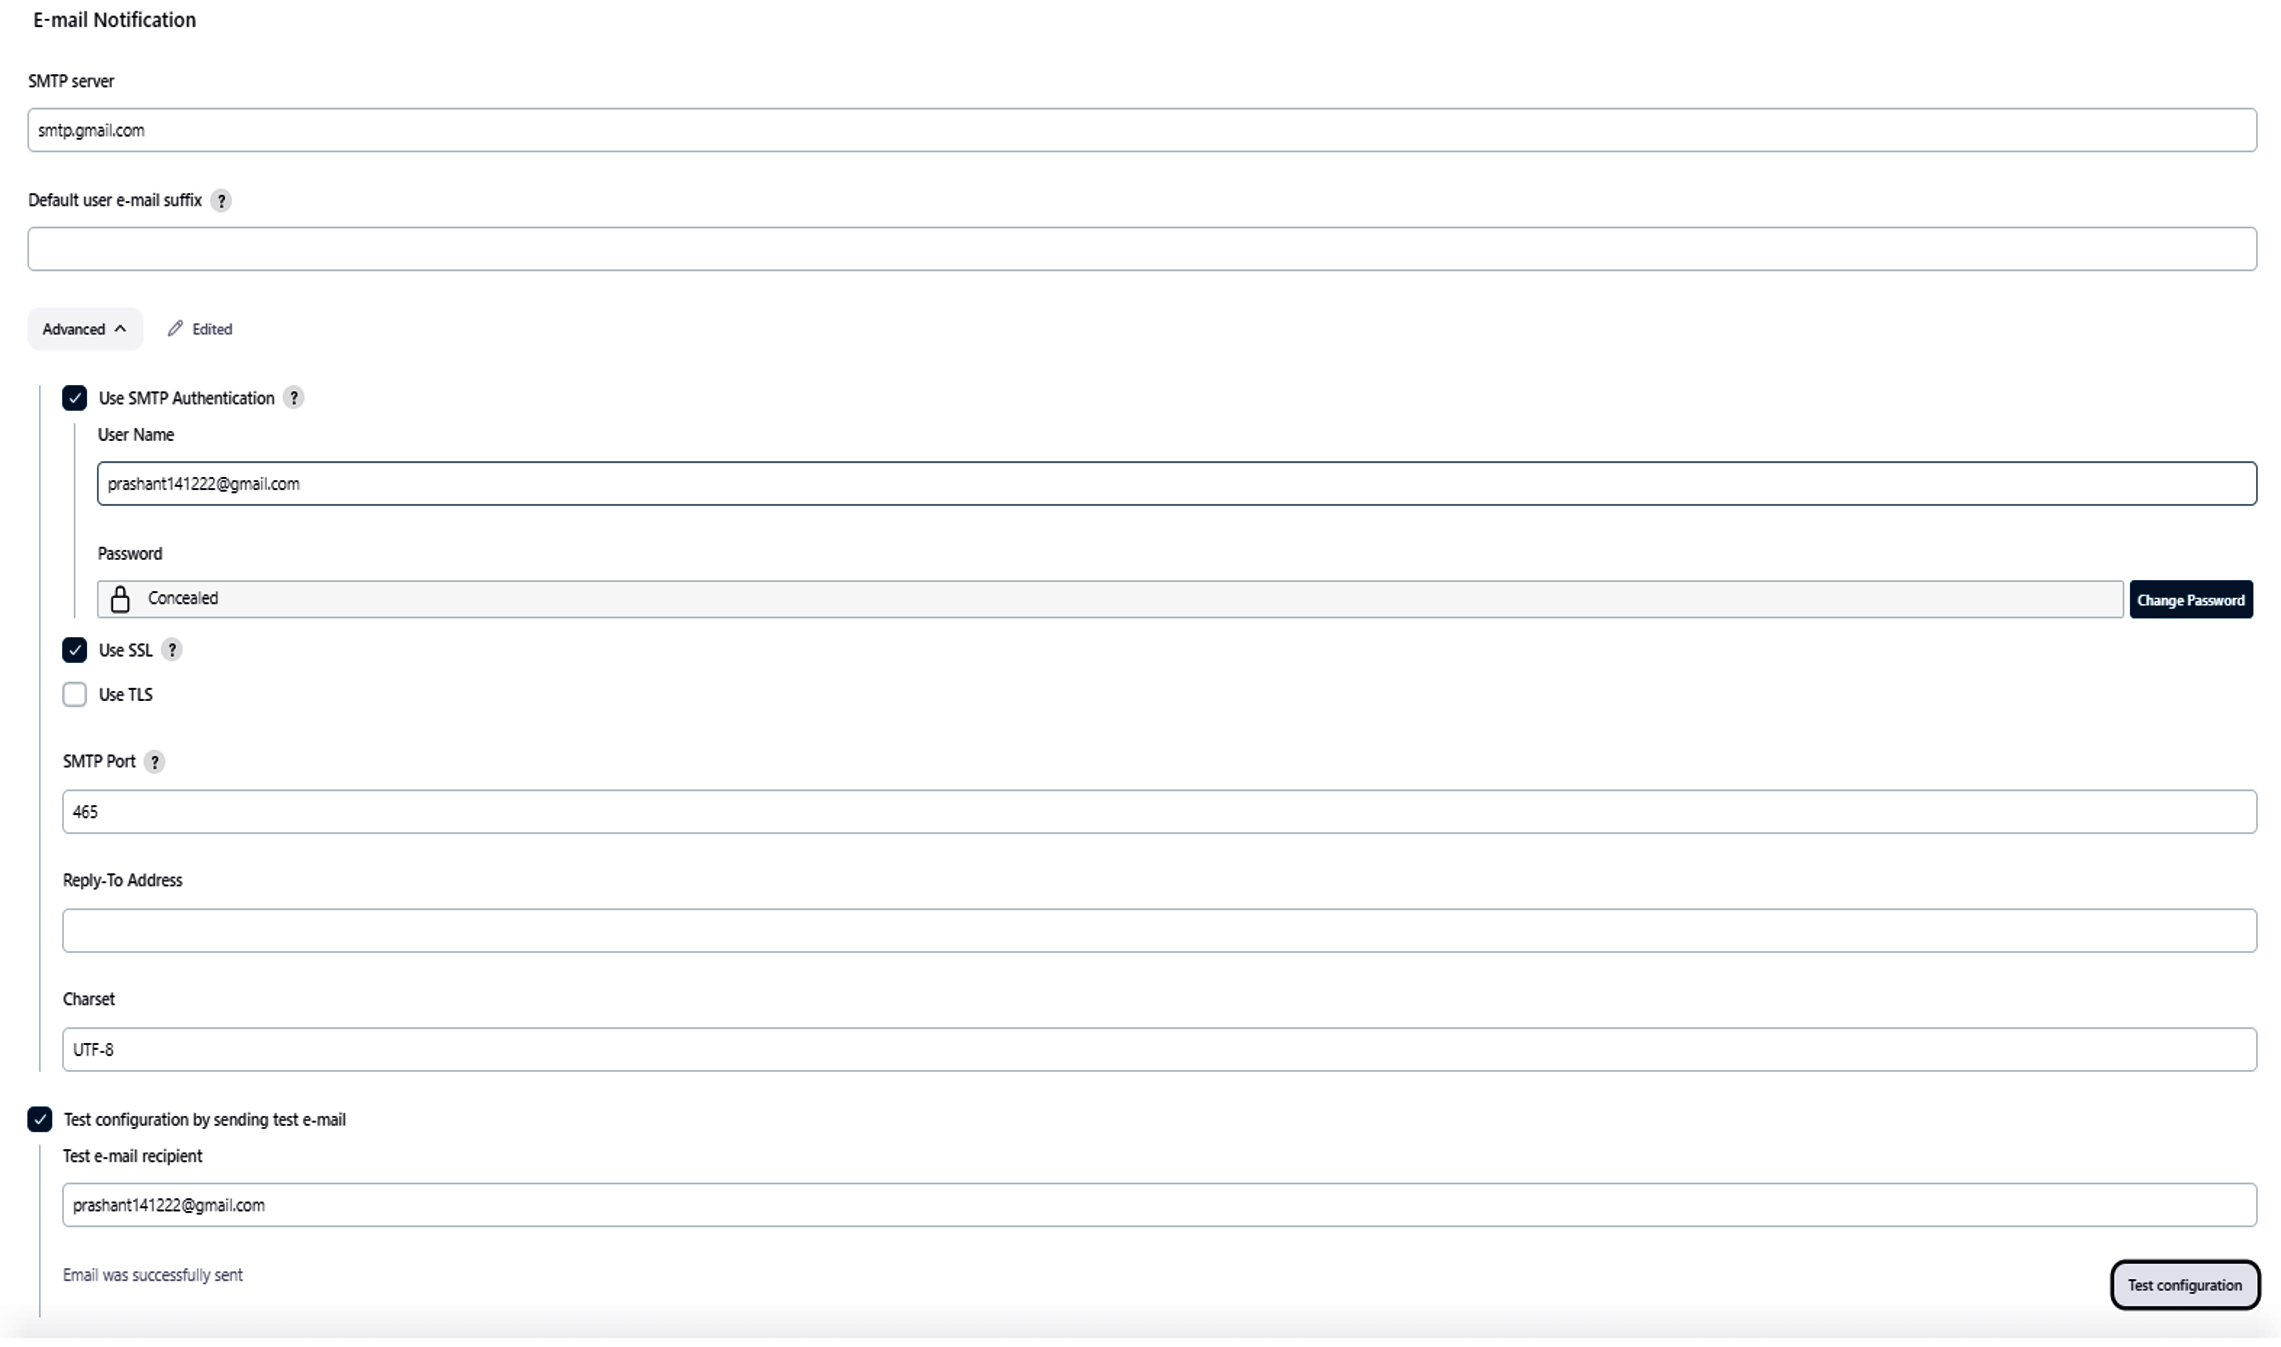
Two-step verification should be enabled, and an app password must be created on Gmail for email notifications. Configure email notification in Jenkins configuration settings.
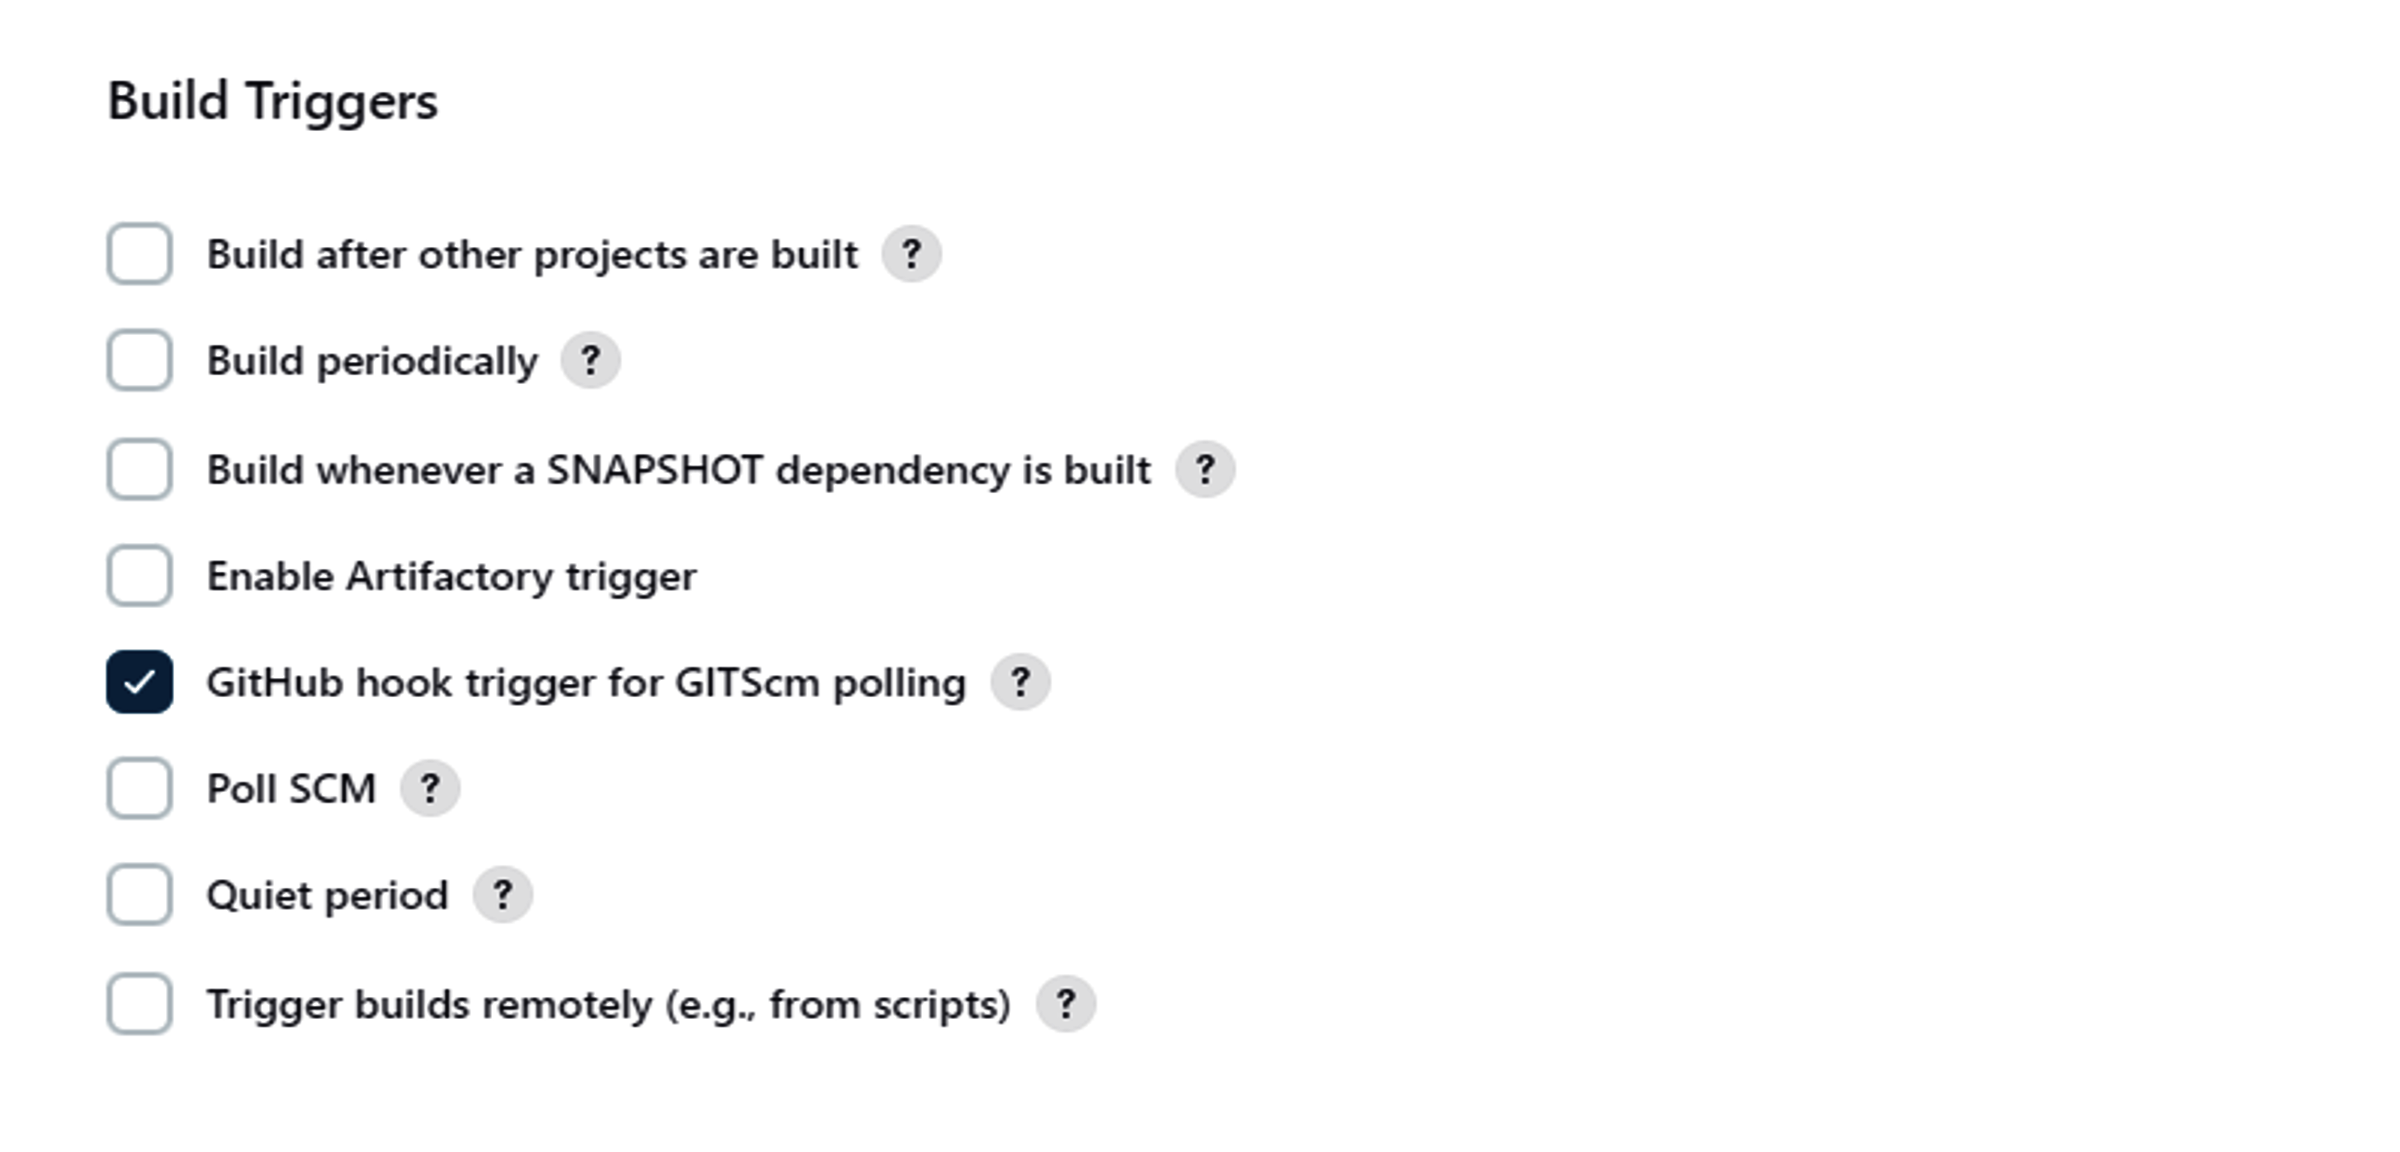
Additionally, enable GitHub hook trigger for GIT SCM polling for webhooks.
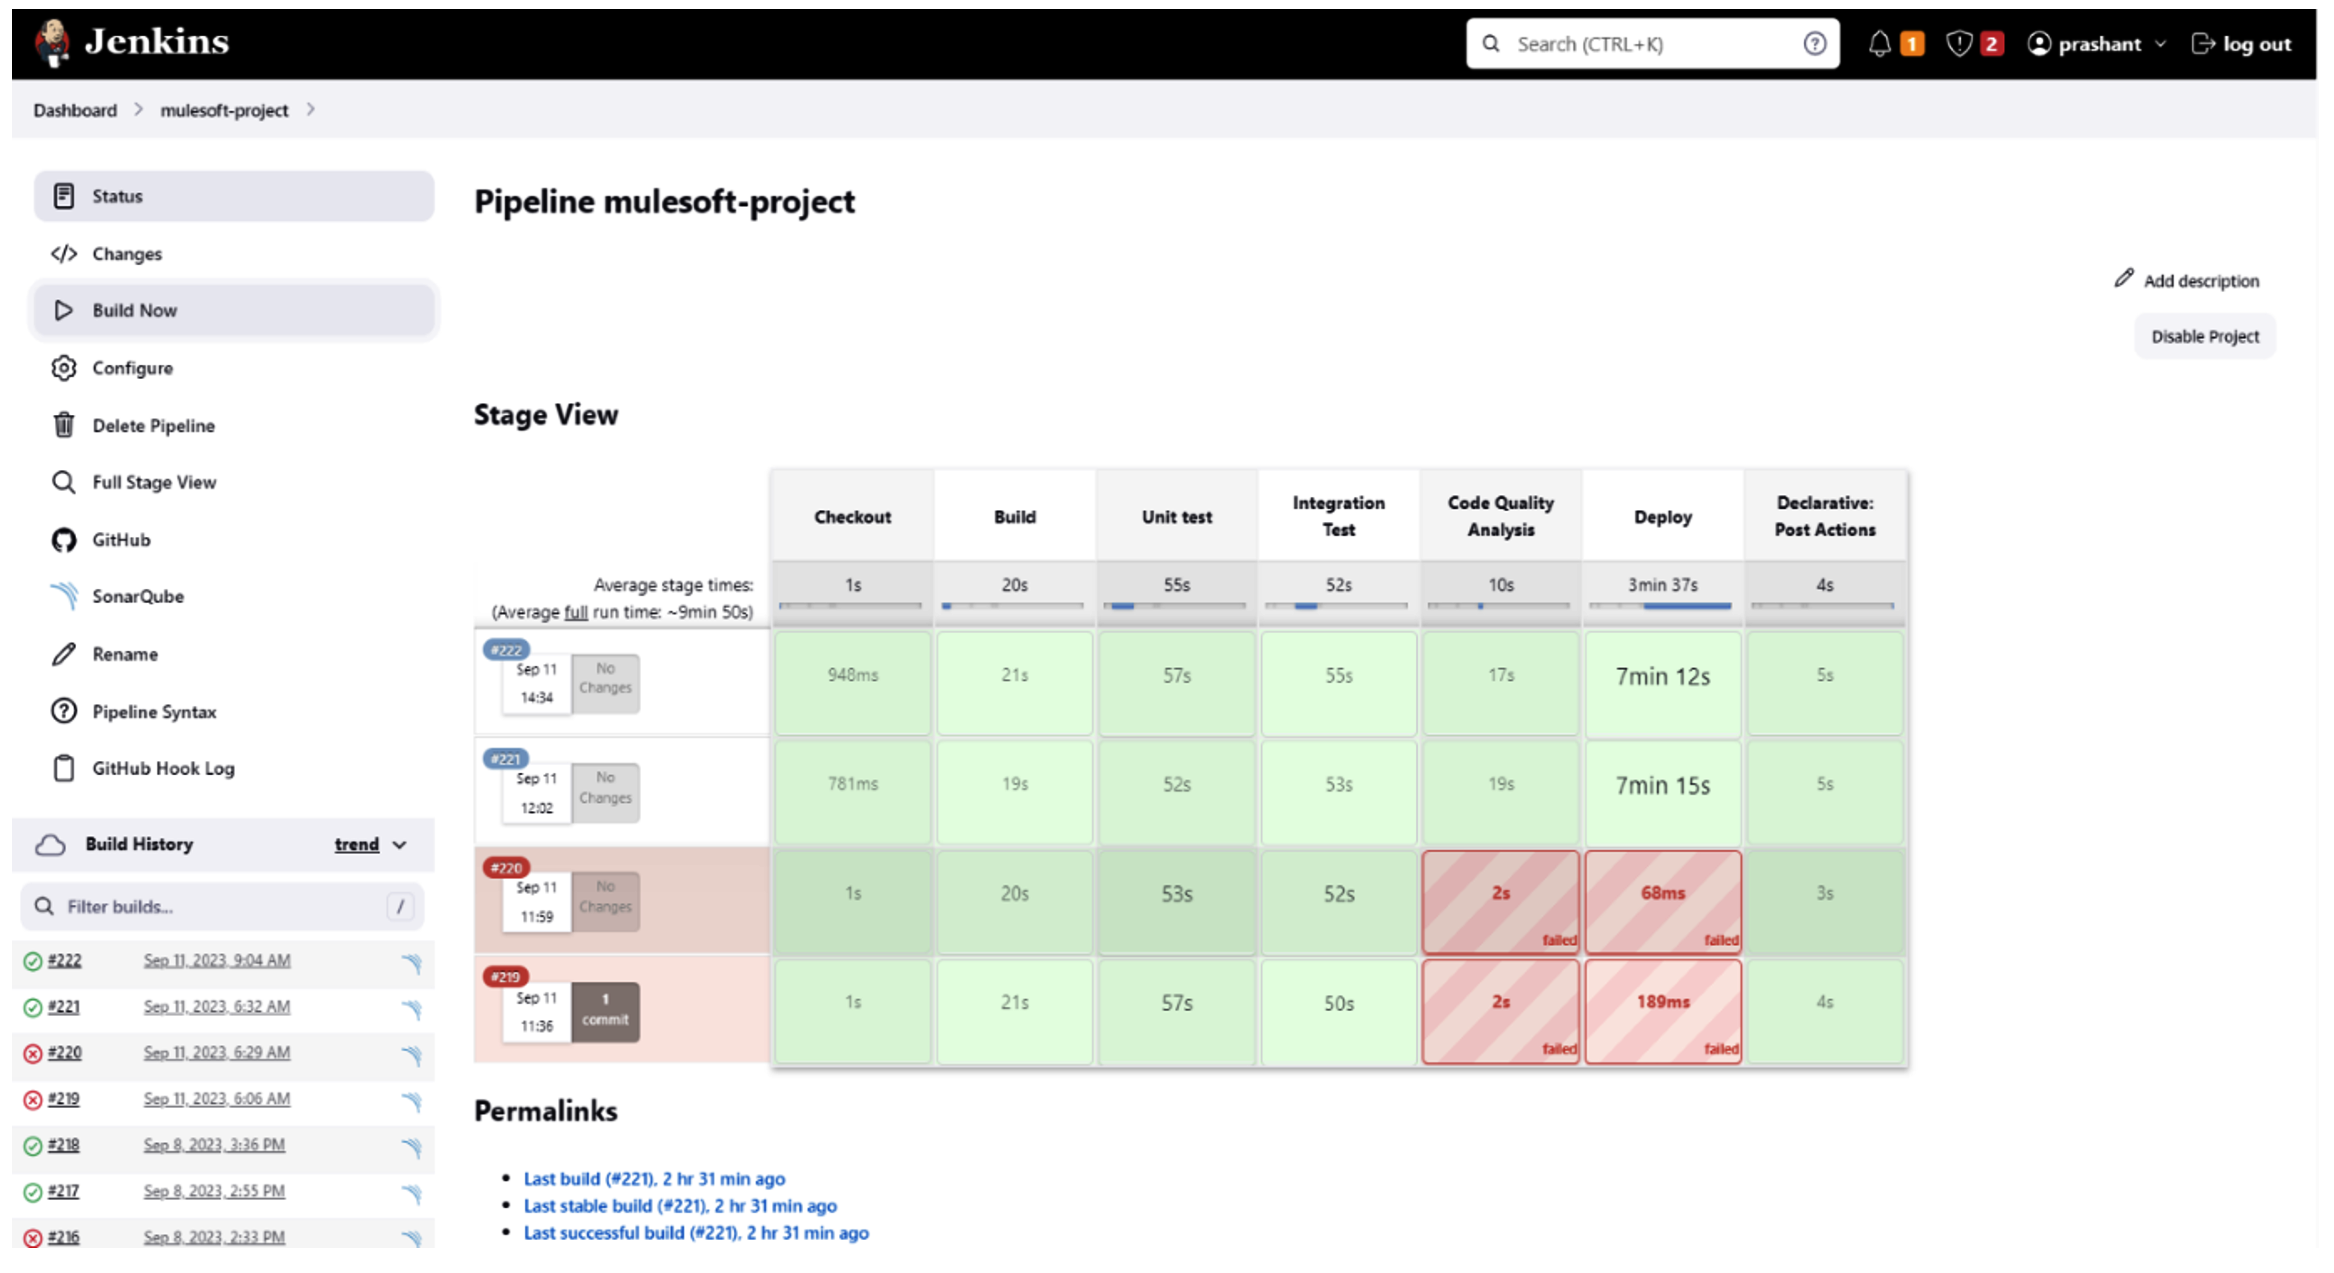
The pipeline has been successfully completed
Conclusion:
This Jenkins pipeline automates the deployment process of your MuleSoft application. Be sure to customize it according to your specific project and requirements. If you would like to know how CloudFulcrum can help your organization, contact us or email us at support@cloudfulcrum.com.
